Nuke: Creating paintings
January 14, 2012 9 Comments
My new Nuke tool: RandomTile.
Tile a given image at random positions, sizes and rotations, filling the project format.
This new tool of mine was more of a test to see how far I can push Nuke. When it didn’t explode and take the computer with it, I added more and more features and to my surprise Nuke took it on the chin. It turns out that there’s seemingly no limit to the amount of nodes in a script, so long as you put them in a group.
RandomTile can be used in many ways including:
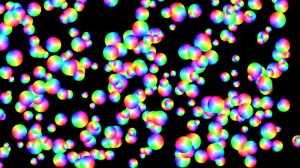
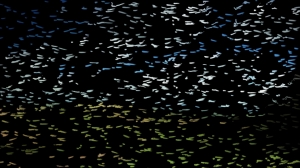
1) Splatter a shape or image randomly over the screen at varying sizes and rotations. Useful if you want to quickly create a larger texture or repeating pattern to wrap onto some geometry, for example. This is why I initially made the tool; the existing Tile node just repeats the image in a uniform grid. Even using several Tile nodes and rotating them and moving them around on top of each other still produces obvious repeating lines. Here’s an example plugging the standard ColorWheel into RandomTile:
2) Make simple 2D particles by plugging in an animated shape. It will randomly offset the time for each tile. Take the above ColorWheel and put a transform after it, animating it back and forth, up and down, doesn’t matter if it goes way off screen, then make a RandomTile with a time variation of 50 frames, Scale variation and Rotation Variation of 1. As each tile has its own scale, rotation and time offset, they will all appear to be moving around independently. If your global range is 1-100, extend the animation at least 50 frames beyond each end of the timeline to get the best result. For quick results, use my tool AnimationMaker to generate a continuous animation curve. With a noise wave you could easily make a bunch of wobbling bacteria or buzzing insects. A slow meandering animation and you could perhaps make snow or dust particles without going into 3D.
To give the illusion of distance, you have the option to ‘stack’ the tiles with the smallest at the back and larger ones in front (closer to the camera, as it were). You also have the option to generate a depth matte, based on the size variation, so you can add a ZBlur at the end to introduce depth of field, or use it to grade smaller/larger ones differently. Here’s an example of a simple buttlerfly image using those options:
…and here’s a look at another example of the depth matte created:
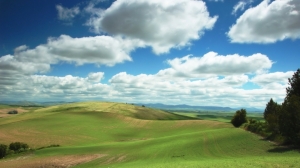
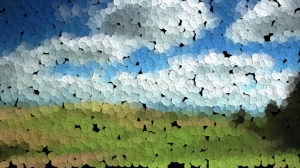
3) Make a random stylised version of a second image using embossed tile shapes. It also gives you the option to plug in a second ‘Source’ image and instead of using the tile’s original colour, each tile takes its colour from the average colour at that position on the second image. The result is, when each tile is put together, it builds the second image, in a pixellised/mosaic kind of way. You also have the option to emboss each tile to give it more texture. Here’s an example using the colourwheel and a photo:
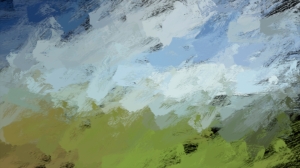
4) Create a ‘painted’ version of a second image by using various brush shapes as tiles. Circles are one thing, but if you grab a brush stroke image from somewhere and use the above method, with some playing around and choosing different sizes and options you can create coloured brush strokes to make up the second picture. The best thing is, as RandomTile preserves the alpha of each tile, you can make several RandomTile nodes using the same Source image, but different brush shaped tiles, and merge them over each other. There is also the option to provide a Distortion Map, which distorts each tile before the colour is applied to it. So, give it a lumakey of the photo and the brush strokes will be persuaded to shape themselves to the photo more. Here’s a quick example I did using the above photo:
This is a quick example I put together, there are no doubt many ways to do this.
There is another very handy option which I didn’t use in this example: provide a Weighting Map; either some kind of lumakey, or hand drawn with rotoshapes. You then have the option to recalculate the position of all tiles and have more of them cluster around the white areas of your Weighting Map than the darker areas. So, if you wanted to concentrate the smaller detail strokes in the centre of the screen, perhaps where a person is, you just draw a white shape there and press the Adjust For Weighting button.
So anyway, a photoshop-style painting effect using nothing but standard nuke nodes. You will need a pretty powerful machine though if you want to use many thousands of tiles. The above was fairly taxing on the high spec linux box I used, but it wasn’t that slow considering there are about 5000 tiles in total (approx 50,000 nodes internally, all linked up in a complex script with expressions and everything). The creation of a RandomTile node takes a little while, but the above frame only took a few seconds to render. This tool is free to use at your own risk; if your machine starts to smoke as a result of using it, I take no responsibility 😉 I’ve tried it on my 3-year-old iMac at home and it runs fine, but is noticeably slower than the production linux box when you start using more than 1000 tiles.
What does a complex script with 50,000 nodes in it look like? Well, I can’t tell you, because Nuke allows you to generate insane scripts inside a group using python, but woe betide anyone who tries to open the group to have a look inside. But, as I can just put all the controls on the outside, there’s never any need to open the magic box.
5) Create a moving ‘painting’ by also providing distortion and ripple maps based on the plate. Now, a pretty painting effect is fine, but applying it to a moving image is probably what you want. I’ll be frank, it’s hard to achieve decent results because if the tiles were somehow regenerated on every frame, you’d get horrible flickering and it’d be a mess. If they don’t move at all (the default for RandomTile), it’s better, but the image would seem to move behind the strokes, like looking through a stained glass window. I have come up a couple of solutions that are somewhere in between: Provide a lumakey or roto of the plate as a Distortion Map as mentioned above. This way, when things move behind the strokes, the strokes themselves get smooshed around a bit. Combine that with the further option of providing a Ripple Map and with some playing around you might get something that works. The Ripple Map is again perhaps just a high contrast luma key of the plate. When a tile is over a white pixel it moves up and right a set amount, when it’s over a black one, it’s back to the original position. As a gradient moves behind it, it will move more as it gets brighter. The upshot is, as a bright object moves around underneath, a ripple is sent through the tiles as it passes beneath them. Will need experimentation, but I had a play around and it gave an interesting result.
Get RandomTile here. The zip file contains the .py file containing all the functions, the icon and an example menu.py file showing you how to set up a button in the toolbar. If you find it useful or fun, let me know. I’m sure people can come up some inventive ways to use it.
